
Submitting a Google form to Jira. Really? Why? There are good reasons.

Hello, after a long break I am back.
Recently my wife came to me for a quick brainstorm to submit Jira tickets via a google form.
Why? well, I asked her the same thing. She told me that it was easy to create a form, it will alleviate some costs and let the developers focus on more important things than creating tickets.
Challenge accepted!!!
First, there is for sure a Jira API I could use right? and it has a vast documentation.
Well... There is, but ohhh man it was painful to find the right document.
I thought this was going to be an easy task, but the documentation was confusing.
Fear not, I have the links to the proper endpoints.


These 3 links will have all the info we need. Why 3 different links? Well.
- Obtain the personal access token
- The JSON format for the POST request
- The headers needed to obtain access to the API
Obtaining the personal access token
Go to your account settings

Select security/API Tokens and create the token

Copy the token somewhere secure as we will use it later to access the API
Create the Request Headers and Post Request
As always, I will provide a Postman collection
{
"fields": {
"project": {
"key": "yourprojectkey"
},
"summary": "Summary of the task",
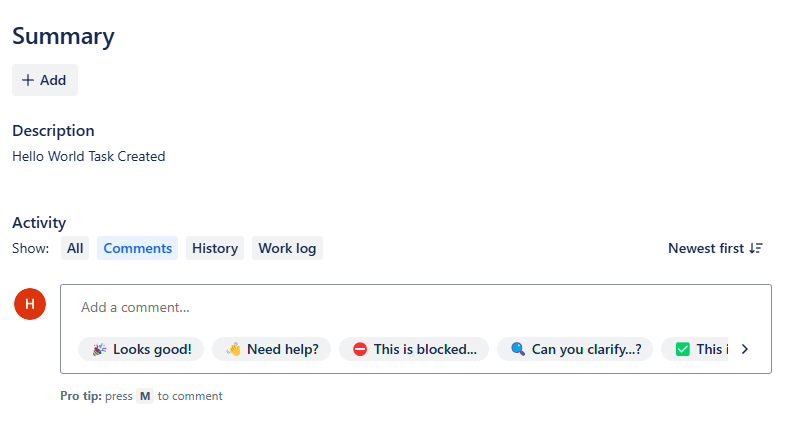
"description": "Hello World Task Created",
"issuetype": {
"name": "Task"
},
"assignee": {
"id": "{{asigneeGroupId}}"
},
"priority": {
"name": "High"
}
}
}Nothing major, we are just providing the body of the task by providing the project key from Jira

You can get the key from the list of all the projects.
The assignee it can be a group or a person, you need to provide the id. You can extract the id from the URL

The rest of the fields are self-explanatory.
Now we will create the environment with the following variables
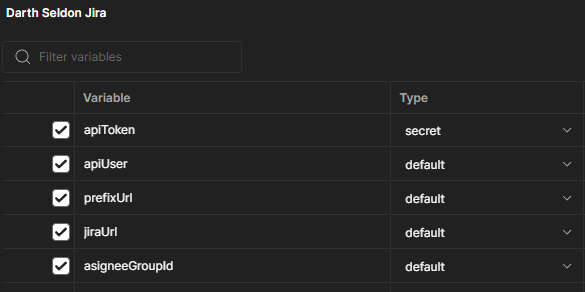
- apiToken is the token we just created
- apiUser is the EMAIL and let me make this clear, it is the email, not the user name.
- prefixUrl is the jira instance that you are using an example https://mycompany.atlassian.net/jira (prefix is mycompany)
- jiraUrl is the target api https://{{prefixUrl}}.atlassian.net/rest/api/2/issue
- assigneeGroupId is the group or person we will be assigning the ticket
- projectKey is the key we retrieve earlier that will be the target for the task
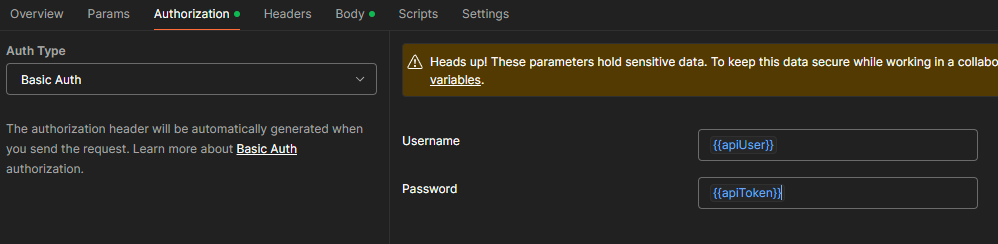
Last, we will add the basic auth to the headers in postman.
And create the post request
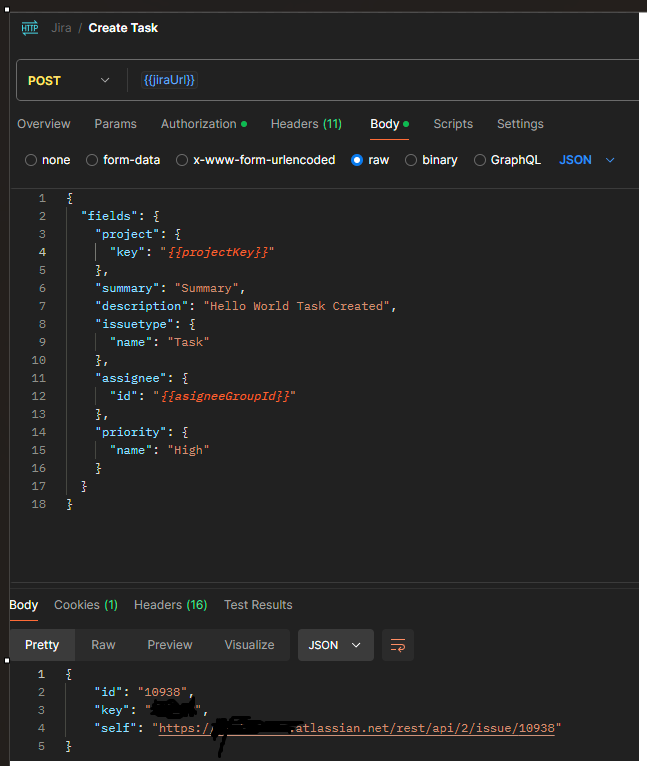
Success!!
A couple of observations, basic auth, really? Wouldn't be better to have a bearer token and manage the scopes? maybe I am too picky.
The documentation also does not list all the possible fields and values (enumerations anyone)
The versioning of the API looks weird, but it works, and it is all that it matters.
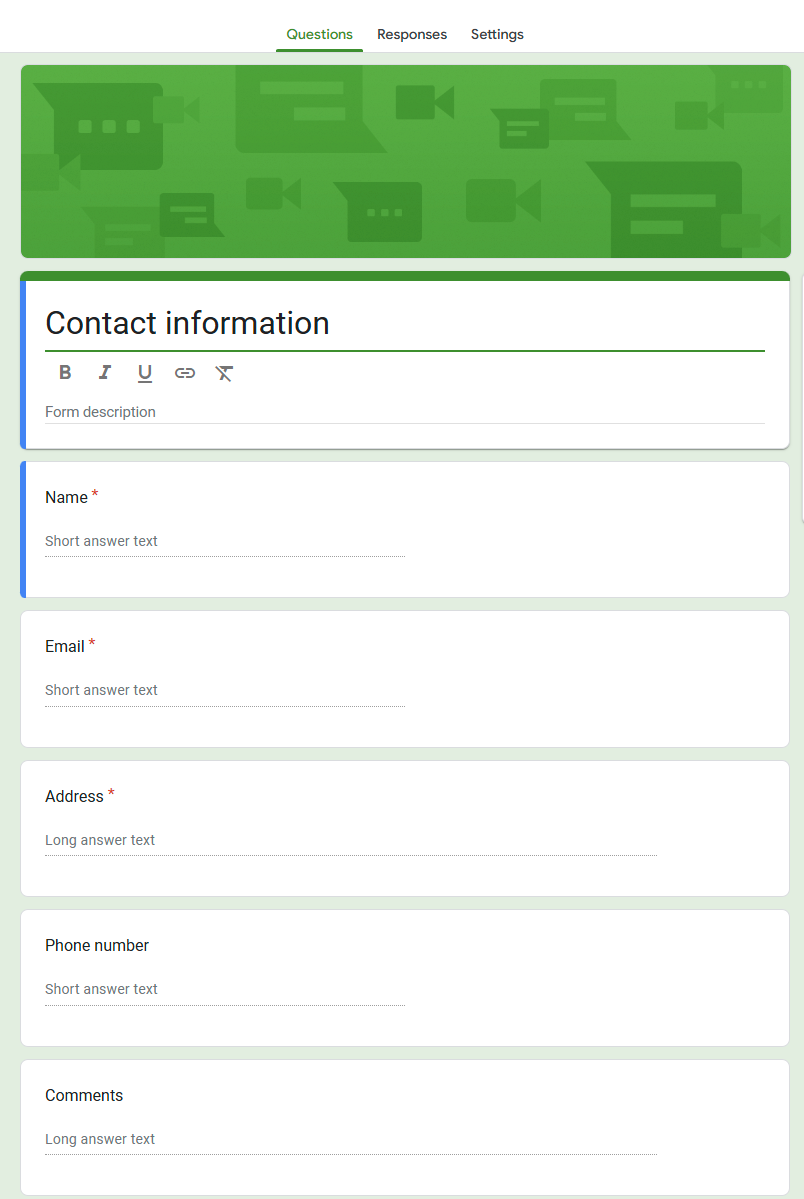
Google form
We will be creating a simple google form, in fact I used the sample form
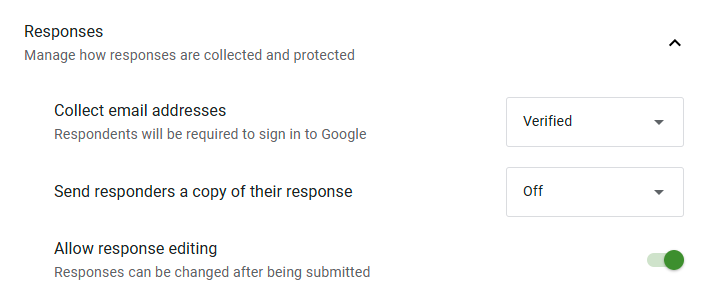
Next go to the settings and add the verified email, as this will give the form the respondent email, who is sending the form.
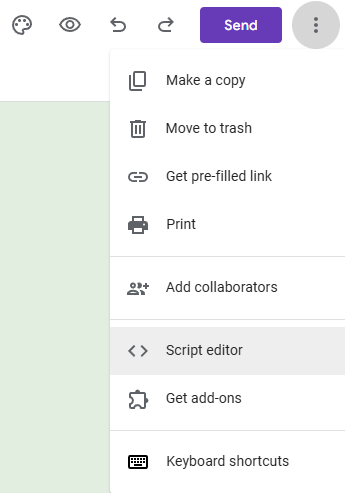
Now the script to send the form, select script editor.
Copy paste the node js script
/**
 * Summary. Jira Issue Creation.
 *
 * Description. NodeJS script that handles the creation of issues in the JIRA API
 *              using Google Forms as the backplane.
 *
 * Author. Darth Seldon.
 */
function onFormSubmitDeux(e) {

    //member variables
    var formId = "formid";
    var basicHeaderBase64 = "Basic (base64 some@email.com:token)";
    var projectKey = "projectKey";
    var description = "Task\n";
    var issueType = "Task";
    var summary = "Summary";
    var priority = "High";
    var assigneeGroupId = "assigneeGroupId";
    var url = "https://mycompany.atlassian.net/rest/api/2/issue";
    var noEmailTarget = "some@email.com";
    var emailTitle = "Task Email";

    //Form information
    var form = FormApp.openById(formId);
    var formResponses = form.getResponses();
    var lastResponse = formResponses.length;
    var formTitle = form.getTitle();
    var formResponse = formResponses[lastResponse - 1];
    var itemResponses = formResponse.getItemResponses();
    var email = formResponse.getRespondentEmail();

    for (var j = 0; j < itemResponses.length; j++) {
        var itemResponse = itemResponses[j];
        var title = itemResponse.getItem().getTitle();
        var answer = itemResponse.getResponse();
        description += title + ": " + answer + "\n";
    }

    //Jira Request
    var headers = {
        "content-type": "application/json",
        "Accept": "application/json",
        "authorization": basicHeaderBase64
    };


    //Request Data
    var data = {
        "fields": {
            "project": {
                "key": projectKey
            },
            "summary": summary,
            "description": description,
            "issuetype": {
                "name": issueType
            },
            "assignee": {
                "id": assigneeGroupId
            },
            "priority": {
                "name": priority
            }
        }
    }

    var payload = JSON.stringify(data);

    var options = {
        "content-type": "application/json",
        "method": "POST",
        "headers": headers,
        "payload": payload
    };


    var response = UrlFetchApp.fetch(url, options);

    //Jira Response

    if (!email.length) {
      email = noEmailTarget;
    }

    if(!formTitle.length) {
      formTitle = emailTitle;
    }

    var data = JSON.parse(response.getContentText());
    var emailBody = "Task\n" + "https://mycompany.atlassian.net/jira/core/projects/" + projectKey + "/issues/" + data.key;

    MailApp.sendEmail(email, formTitle, emailBody);
}
The script is basically the same as postman, but we are extracting all the fields from the last submitted form and sending the email at the end.
You will need to change a couple of things:
var formId = "formid";
The form id will be the id that is on the url, this is used to retrieve a particular form and the values.

var basicHeaderBase64 = "Basic (base64 some@email.com:token)";
Replace (base64 some@email.com:token) with the base64 string for some@email:token.
If you do not have a tool to encode base64 strings, you can use


var assigneeGroupId = "assigneeGroupId";
var url = "https://mycompany.atlassian.net/rest/api/2/issue";
var noEmailTarget = "some@email.com";
Replace the group id, the mycompany prefix and the default email the ticket url will be sent.
Save the script
OnSubmit event triggering
Select triggers and add a new trigger
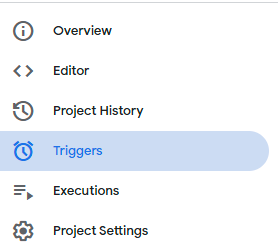
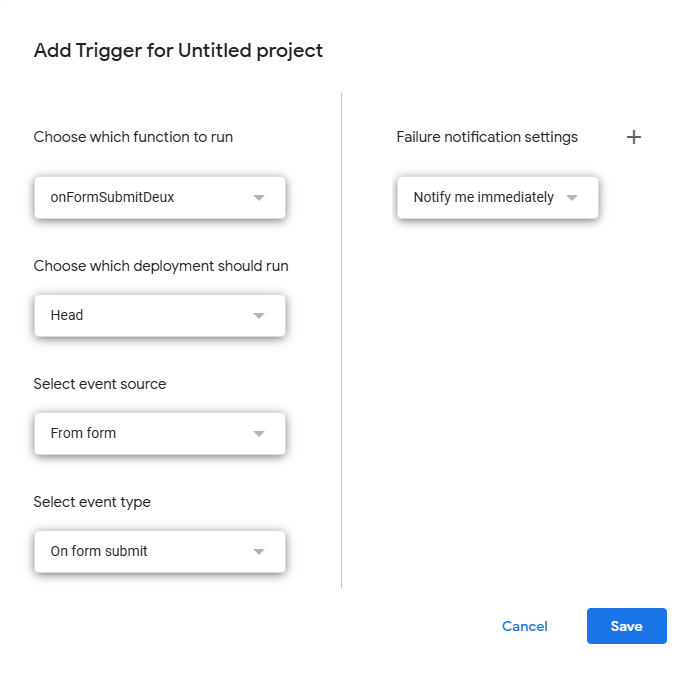
If the script is available, you will be able to select it from the drop down and select the event type on form submit.
This is where I lost an entire day.
Sometimes when I was testing the script, I would get these weird messages that I could not use UrlFetchApp or MailApp.sendEmail.
If you get these exceptions, delete the trigger and readd it again.
Why? well it seems that google infers the scopes or permissions while you are saving the script and will grant those permissions only.
If you modify the script and add new external library call or API; the current trigger will not have that scope. Â
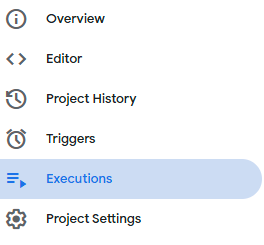
Now you can submit your form and see the execution at
I don't know how many people will find this post helpful, but I know I learned one or two things along the way.
Happy coding!!!