
HomeLab with Docker and Raspberry Pi 5.

A HomeLab is a personal, often DIY (do-it-yourself) setup of computer servers and networking equipment used for learning, experimentation, and sometimes practical tasks like hosting services.
I have a couple Raspberry Pis as home servers where I can do quick proof of concepts, unit testing, code analysis and a lot more.
I will give you my personal favorites for software development, sometime later I will add the fun ones.
Let's begin
Raspberry Pi
I would recommend a Raspberry Pi 5, but you can use another computer.
Raspberry Pi 5
- CPU: Quad-core ARM Cortex-A76 @ 2.4 GHz (64-bit)
- RAM: 4GB or 8GB LPDDR4X (There is a 16 GB but for the price you will be better off with an old laptop, I recommend the 8 GB size)
- GPU: Broadcom VideoCore VII, supports dual 4Kp60 output (You can run Ollama, slow but it works, in another post we will be doing that from docker)
- microSD card slot (Recommended for small workloads and POCs with an 128 GB size)
- PCIe 2.0 x1 (for NVMe SSD via adapter, if you want to do a more permanent setup you can buy an NVMe hat and the SSD, however for practical purpose we will be using a microSD)
- Gigabit Ethernet (Preferred as it will have a bunch of traffic)
- Wi-Fi 802.11ac (dual band)
- Power: USB-C PD (Power Delivery), 5V/5A
Setup the Raspberry Pi
Flash the SD card with the OS (same with NVMe).
Download the imager from
https://www.raspberrypi.com/software/
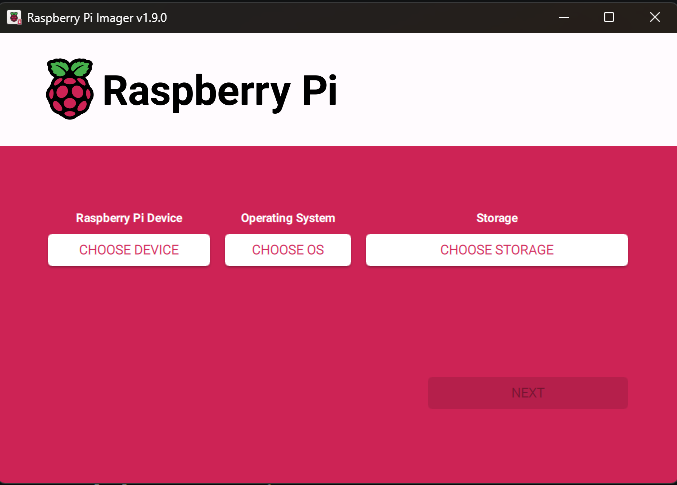
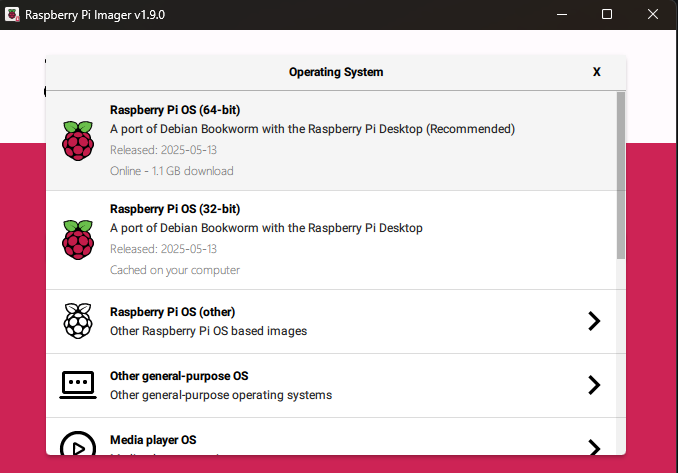
Choose the appropriate device

Select 64 bit
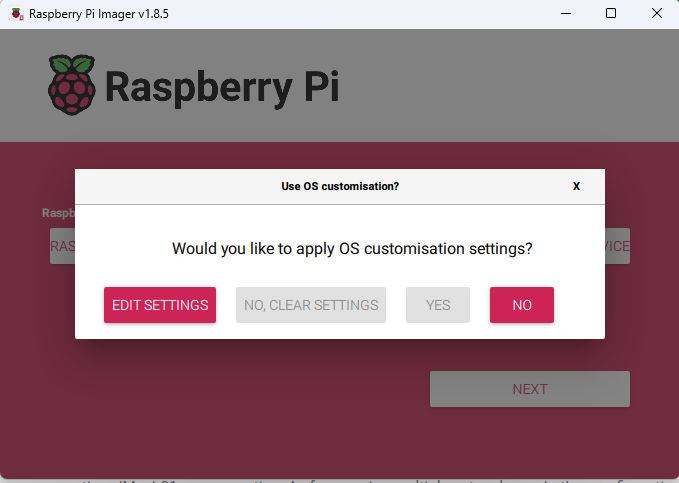
Edit the settings to enable Wi-Fi and ssh, I named the host as homelab and i will be using the madeup user name homelabadmin.
Once you finish flashing, insert the card, turn on the Pi and connect via SSH (cable or wifi).
I use windows terminal, awesome product BTW, but you can use whatever you feel comfortable with. I hope to write a post on how you can customize the terminal.

The command to connect is
ssh homelabadmin@homelabWe are ready to install all the software now.
Docker and software
Updates
As a rule, always update the latest version of the apt
sudo apt update
sudo apt upgrade -y
Docker
Next is Docker, we will download a script from docker and execute it
curl -sSL https://get.docker.com | shAnd add the current user to the docker group.
sudo usermod -aG docker $USERNow, type exit and login again with the ssh command, this is necessary for the current session shell to have the proper permissions.
Docker Compose
We will be using docker compose, it is simpler to give commands to docker and to stand up all the software and networking necessary for our projects.
Also managing the files is really easy once we install Portainer
Portainer
Portainer is a docker management UI tool, it handles the containers, images, logs, networks, etc.
Since we don't have installed docker desktop, you can use Portainer for the same purpose.
Now to create the first docker compose file, we will reuse these commands a lot.
- Create the directory where the docker compose file will reside and potentially all the files needed to execute the container.
- Change to the directory of the stack
- Create the docker-compose file
- Edit the docker-compose file
sudo mkdir -p /opt/stacks/portainer
cd /opt/stacks/portainer
touch docker-compose.yml
sudo nano docker-compose.yml
This will open the nano editor and you can copy-paste the following YAML
services:
  portainer:
    image: portainer/portainer-ce:latest
    container_name: portainer
    restart: always
    ports:
      - "8000:8000"
      - "9443:9443"
      - "9000:9000"
    volumes:
      - /var/run/docker.sock:/var/run/docker.sock
      - portainer_data:/data
volumes:
  portainer_data: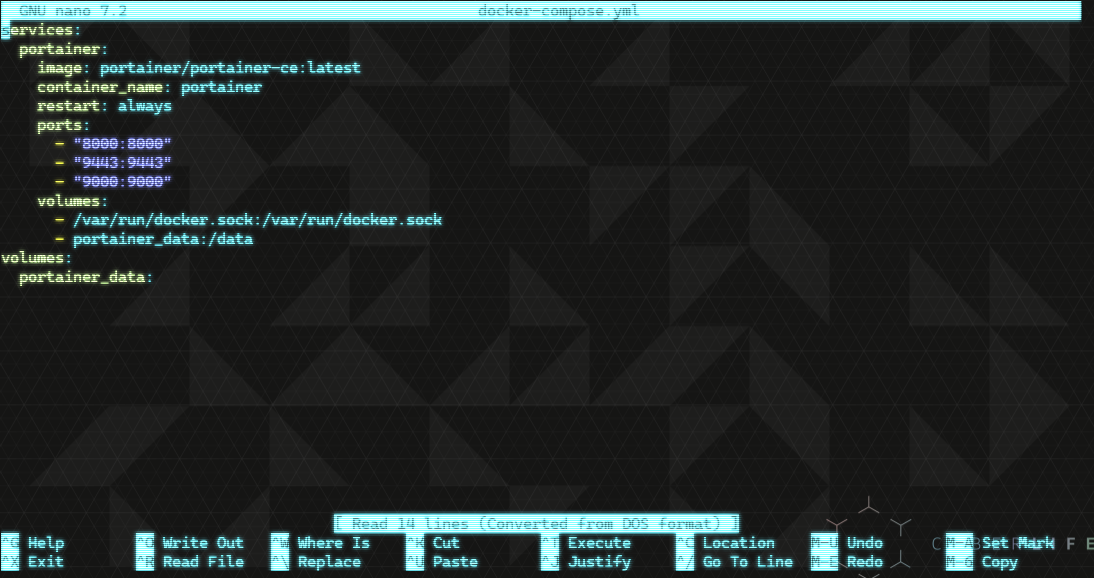
You can save the text with ctrl+x, y and then enter
Be wary of the spaces, yaml it is really opinionated.
A typical docker compose will follow these sections
🔧 services:
This section defines the containers (services) you want to run.
🧱 portainer:
This is the name of the service.
â–¶ï¸ image: portainer/portainer-ce:latest
This tells Docker to use the latest version of the open-source Portainer Community Edition image.
ðŸ·ï¸ container_name: portainer
Names the container "portainer" instead of a random auto-generated name.
🔠restart: always
Makes sure the container automatically restarts if it crashes or if the system reboots.
🌠ports:
This maps ports from your computer to the container:
8000:8000: For Portainer's agent communication (optional, used for managing remote environments).
9443:9443: Portainer’s secure web interface (HTTPS).
9000:9000: Portainer’s classic web interface (HTTP).
So you can access Portainer via:
http://localhost:9000 (classic UI)
https://localhost:9443 (secure UI)
💾 volumes:
This is used to store data and share files between your computer and the container:
/var/run/docker.sock:/var/run/docker.sock:
Gives Portainer access to Docker itself, so it can manage containers on your system.
portainer_data:/data:
Stores Portainer’s settings and data in a named volume so it persists even if the container is deleted.
📦 volumes:
This bottom section defines the portainer_data volume that’s used above. It tells Docker to create a named volume called portainer_data.
Finally execute the command
docker compose up -dIf you get an error use
sudo docker compose up -dWe are letting docker know that there is a docker-compose.yml file in the current directory, bring it up and use detach mode, meaning it will run its own thread and give control to docker.
You can now browse to Portainer using
https://homelab:9443
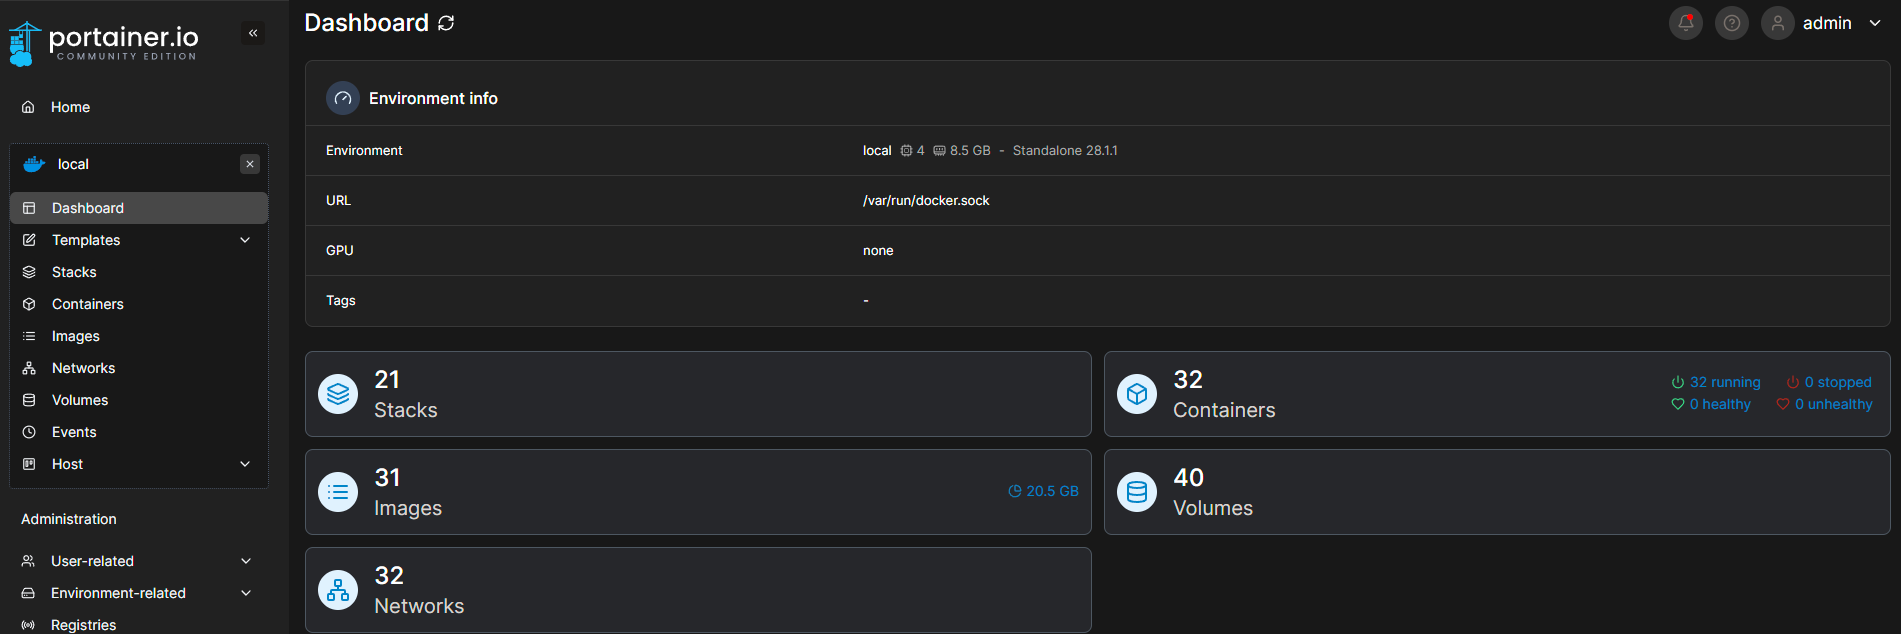
You just need to follow the prompts to create an admin user, and you can see all the information about your containers.
Next step VS Code
VS Code
I like nano but sometimes copying and pasting text from one machine to another is broken, I usually install visual studio on the Pi and access it thru its web UI.
Execute the commands to create the VS Code directory stack
sudo mkdir -p /opt/stacks/vscode
cd /opt/stacks/vscode
touch docker-compose.yml
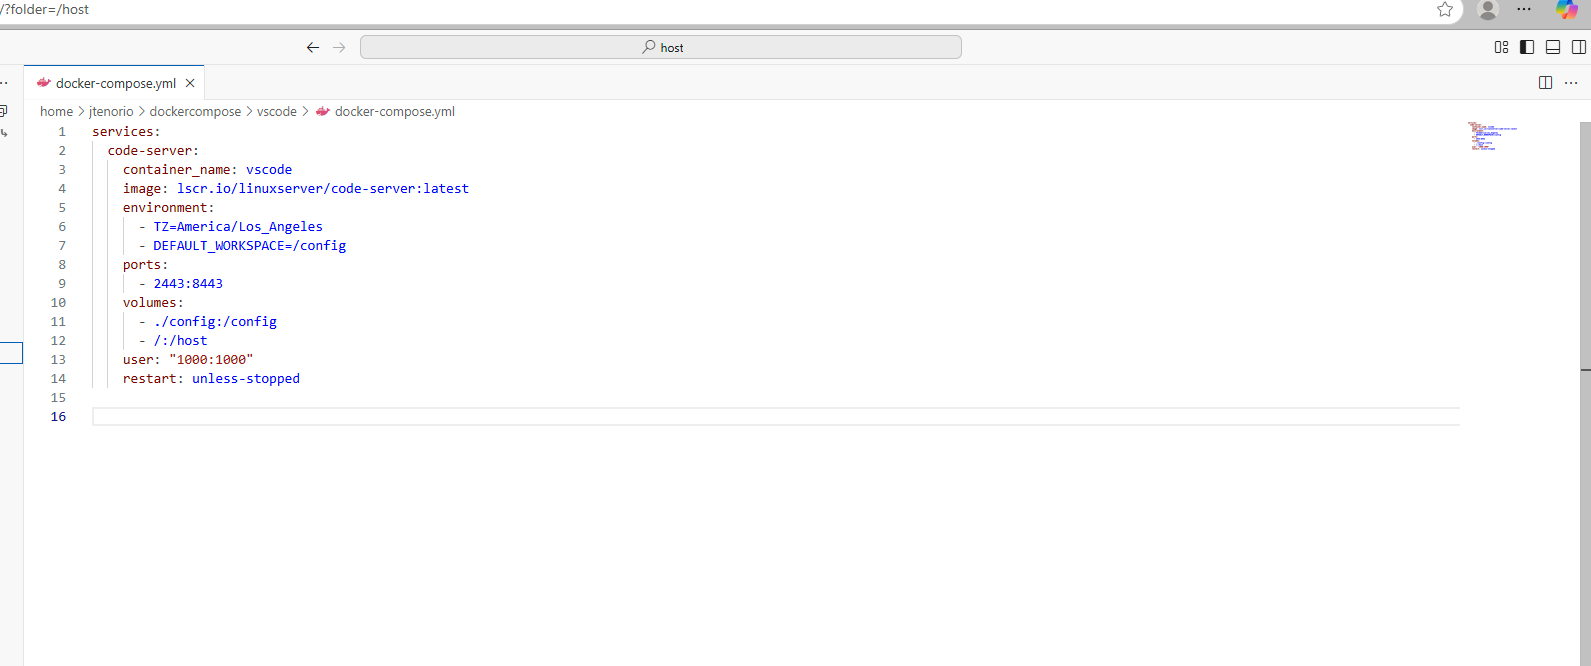
sudo nano docker-compose.ymlUse nano to create the docker-compose.yml file
services:
  code-server:
    container_name: vscode
    image: lscr.io/linuxserver/code-server:latest
    environment:
      - TZ=America/Los_Angeles
      - DEFAULT_WORKSPACE=/config
    ports:
      - 2443:8443
    volumes:
      - ./config:/config
      - /:/host
    user: "1000:1000"
    restart: unless-stopped
Docker compose up
docker compose up -dEasy right! as you can see all the steps repeat for the next stacks
services:
Starts the list of container services to run.
🧠code-server:
This is the name of the service (you can name it anything you want).
ðŸ·ï¸ container_name: vscode
Gives the container a fixed name ("vscode") instead of letting Docker assign a random one.
🳠image: lscr.io/linuxserver/code-server:latest
Uses the latest version of the LinuxServer’s code-server image, which runs VS Code as a web app.
🌎 environment:
Sets environment variables inside the container:
TZ=America/Los_Angeles: Sets the time zone to match your local time.
DEFAULT_WORKSPACE=/config: Sets the default folder opened in VS Code when it launches.
🌠ports:
2443:8443:
Maps port 8443 inside the container (code-server's default secure port) to port 2443 on your host machine.
So, you can access it by going to https://localhost:2443 in your browser.
💾 volumes:
These give the container access to files on your computer:
./config:/config:
Saves code-server settings and extensions in a folder called config (in the same directory as your docker-compose.yml), so your setup is saved between restarts.
/:/host:
Lets you browse your entire host file system inside code-server. This is powerful but risky—use with caution!
👤 user: "1000:1000"
Runs the container as a specific user (user ID 1000, group ID 1000), which is usually the first user created on a Linux system. This avoids permission problems when accessing files.
🔠restart: unless-stopped
Automatically restarts the container unless you stop it manually.
You can use VS Code to create your POCs, editor, bash terminal, etc. In another post I will show you how to leverage this.
For now, it will serve us to create folders, files and edit them. Â If you want you can install the plugin for docker and execute the docker compose command directly from the editor, but I preferr using the terminal for commands and the editor just to edit files.
Now I will not explain the next docker compose files in detail but will list the use and give you the contents.
Azurite
Azurite will emulate azure services such as
- Blob storage (Introduction to Blob (object) Storage - Azure Storage | Microsoft Learn)
- Storage queues (Introduction to Azure Queue Storage - Azure Storage | Microsoft Learn)
- Storage tables (Table storage | Microsoft Azure)
Great for low budget solutions
services:
  azurite:
     image: mcr.microsoft.com/azure-storage/azurite
     container_name: azurite
     hostname: azurite
     command: 'azurite --loose --blobHost 0.0.0.0 --blobPort 10000 --queueHost 0.0.0.0 --queuePort 10001 --tableHost 0.0.0.0 --location /workspace --debug /workspace/debug.log'
     ports:
      - 10000:10000
      - 10001:10001
      - 10012:10002
     volumes:
      - ~/dockervolumes/azurite:/workspace
No UI, but you can use storage explorer and .NET libraries to interact with it

Grafana with Postgres
Grafana is a tool that lets you visualize data—you can build beautiful dashboards and charts from your data sources. We will use Postgres to save the configuration from Grafana.
services:
grafana_postgres:
container_name: grafana_postgres
image: postgres:15
restart: always
environment:
POSTGRES_DB: grafana_db
POSTGRES_USER: grafana_usr
POSTGRES_PASSWORD: myweirdPassword!!!
volumes:
- postgres-storage:/var/lib/postgresql/data
grafana:
image: grafana/grafana-enterprise:latest
container_name: grafana
restart: unless-stopped
environment:
GF_DATABASE_TYPE: postgres
GF_DATABASE_HOST: grafana_postgres
GF_DATABASE_NAME: grafana_db
GF_DATABASE_USER: grafana_usr
GF_DATABASE_PASSWORD: myweirdPassword!!!
ports:
- '3200:3000'
volumes:
- grafana-storage:/var/lib/grafana
volumes:
grafana-storage: {}
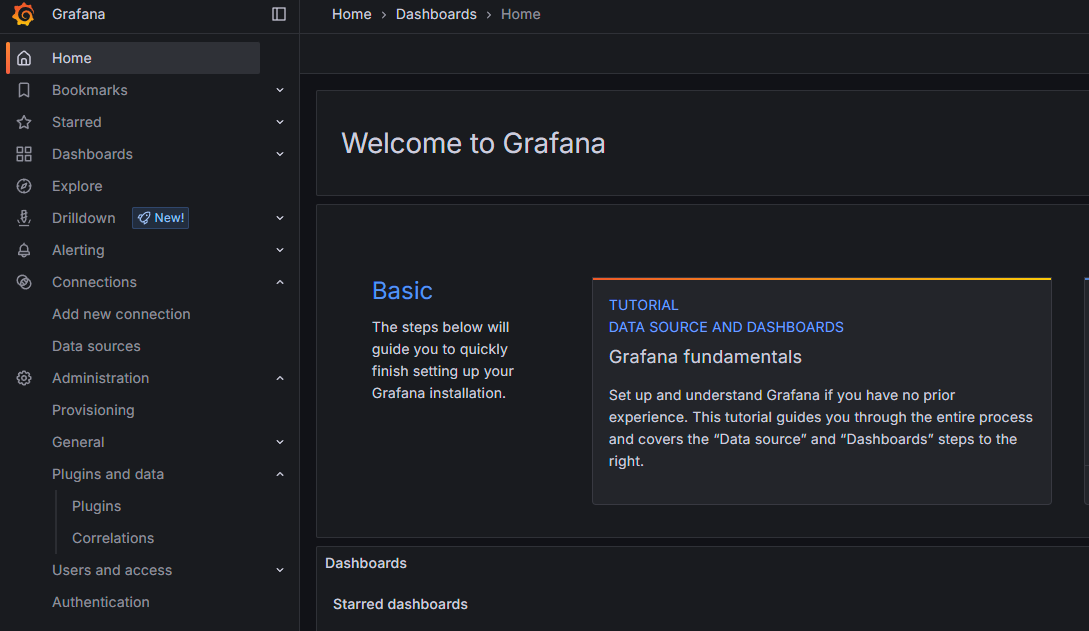
postgres-storage: {}Login using http://homelab:3200
Fun projects for Grafana
- Speed monitor (execute speed tests and record them in Postgres and create a dashboard)
- Weather (consume the us weather system rest Api endpoints and create a dashboard)
- .NET telemetry (send .NET telemetry to Postgres and analyze it)
Hashicorp Vault
Create secrets and access them securely (I prefer Azure Key vault, but that costs money and we are building our own HomeLab)
services:
vault:
image: hashicorp/vault:1.17
container_name: vault
cap_add:
- IPC_LOCK # Lock memory to prevent sensitive data from swapping to disk
environment:
VAULT_DEV_ROOT_TOKEN_ID: keytouse # Root token for dev mode
VAULT_ADDR: http://0.0.0.0:8200 # Set the Vault address
ports:
- "8200:8200" # Expose Vault on port 8200
command: server -dev # Start Vault in development mode
volumes:
- vault-data:/vault/file # For future use, persistent storage in production
healthcheck:
test: ["CMD", "vault", "status"]
interval: 30s
timeout: 10s
retries: 5
volumes:
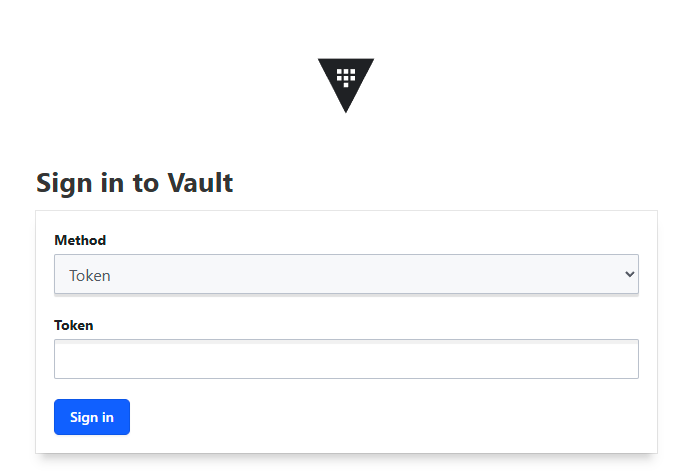
vault-data:Access it with http://homelab:8200
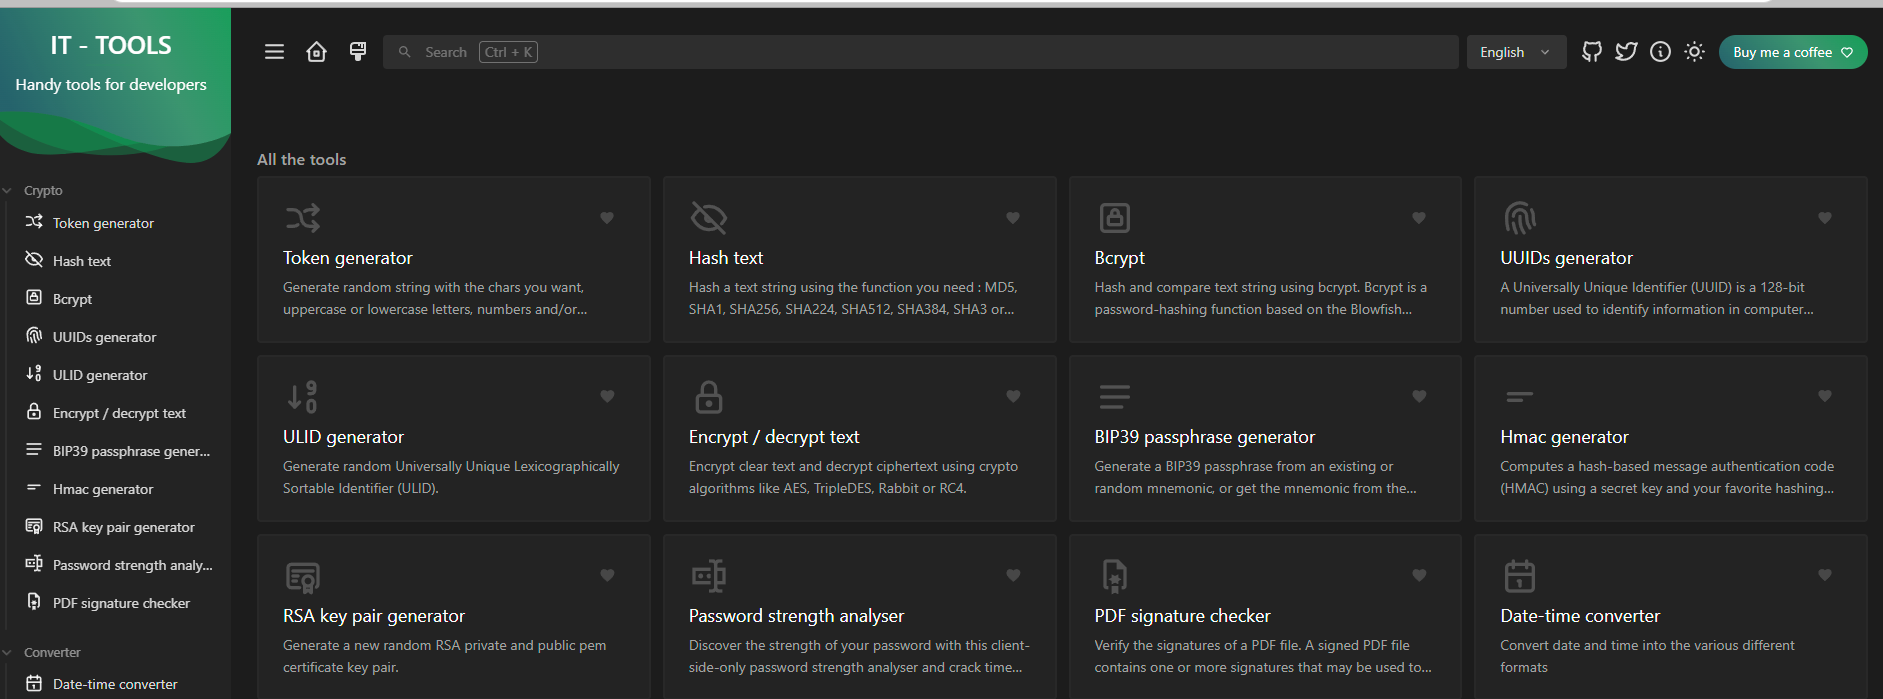
IT-Tools
Ever wanted a site that has all the things a Software engineer needs daily?
- Decoding JWT
- Generate random strings
- Create public/private keys
services:
    it-tools:
        image: 'corentinth/it-tools:latest'
        ports:
            - '2546:80'
        container_name: it-tools
http://homelab:2546
Postgres
The open source and undefeted database that can do mostly everything
services:
  db:
    image: postgres:16-alpine
    restart: always
    environment:
      - POSTGRES_USER=myadminuser
      - POSTGRES_PASSWORD=mySuperSecureAdminPassword@#!
    ports:
      - 5432:5432
    volumes:
      - ./data:/var/lib/postgresql/data
No UI but you can use pgAdmin
services:
  pgadmin:
    image: dpage/pgadmin4:latest
    environment:
      PGADMIN_DEFAULT_EMAIL: "madeupemail@server.com"
      PGADMIN_DEFAULT_PASSWORD: "mySuperSecurePGAdminPassword9*&%"
    ports:
        - "8095:80"
http://homelab:8095
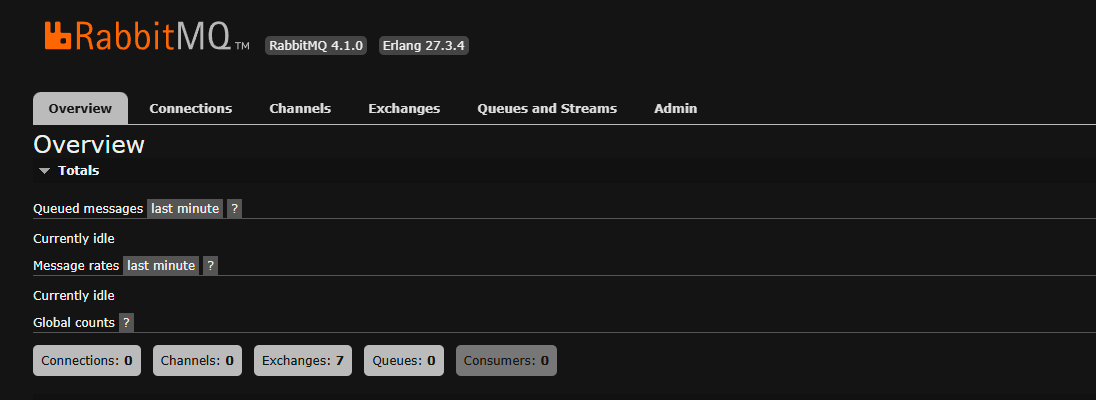
MQ-Rabbit
Open source Queuing, more powerful than azure storage queues, it supports also topics
services:
  rabbitmq:
    image: rabbitmq:management
    container_name: rabbitmq
    environment:
      - RABBITMQ_DEFAULT_USER=mymquser
      - RABBITMQ_DEFAULT_PASS=rabbitmqpass@#$
    ports:
      - "5672:5672"
      - "15672:15672"

networks:
  default:
    driver: bridge
http://homelab:15672
Redis
Fast cache and queuing
services:
  cache:
    image: redis:6.2-alpine
    restart: always
    ports:
      - '6379:6379'
    command: redis-server --save 20 1 --loglevel warning --requirepass myredispassword&*^
    volumes:
      - cache:/data
volumes:
  cache:
    driver: local
No UI but you can use
 qishibo
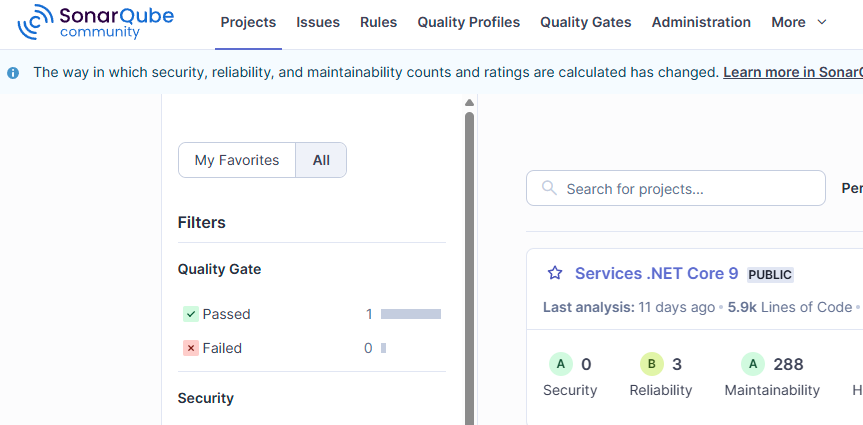
SonarQube
Yes, there is a community version that you can use for simple code analysis
services:
  sonarqube:
    image: sonarqube:community
    hostname: sonarqube
    container_name: sonarqube
    read_only: true
    depends_on:
      db:
        condition: service_healthy
    environment:
      SONAR_JDBC_URL: jdbc:postgresql://db:5432/sonar
      SONAR_JDBC_USERNAME: sonar
      SONAR_JDBC_PASSWORD: sonar
    volumes:
      - sonarqube_data:/opt/sonarqube/data
      - sonarqube_extensions:/opt/sonarqube/extensions
      - sonarqube_logs:/opt/sonarqube/logs
      - sonarqube_temp:/opt/sonarqube/temp
    ports:
      - "9900:9000"
    networks:
      - ${NETWORK_TYPE:-ipv4}
  db:
    image: postgres:17
    healthcheck:
      test: ["CMD-SHELL", "pg_isready"]
      interval: 10s
      timeout: 5s
      retries: 5
    hostname: postgresql
    container_name: postgresql
    environment:
      POSTGRES_USER: sonar
      POSTGRES_PASSWORD: sonar
      POSTGRES_DB: sonar
    volumes:
      - postgresql:/var/lib/postgresql
      - postgresql_data:/var/lib/postgresql/data
    networks:
      - ${NETWORK_TYPE:-ipv4}

volumes:
  sonarqube_data:
  sonarqube_temp:
  sonarqube_extensions:
  sonarqube_logs:
  postgresql:
  postgresql_data:

networks:
  ipv4:
    driver: bridge
    enable_ipv6: false
  dual:
    driver: bridge
    enable_ipv6: true
    ipam:
      config:
        - subnet: "192.168.2.0/24"
          gateway: "192.168.2.1"
        - subnet: "2001:db8:2::/64"
          gateway: "2001:db8:2::1"
http://homelab:9900
These are my must execute containers, I have many more, but they are more related to specific projects.
Next time I will explain how to use the container SonarQube to analyze C# projects.
Happy coding!!!